With enthusiasm, let’s navigate through the intriguing topic related to Let’s Get Colorful! Learning to Draw Skin Tones with Crayons. Let’s weave interesting information and offer fresh perspectives to the readers.
Introduction
Let’s Get Colorful! Learning to Draw Skin Tones with Crayons
Hey there, future artists! I’m your friendly neighborhood drawing teacher, and I’m so excited to help you explore the world of drawing, especially when it comes to capturing the beautiful range of skin tones. Today, we’re going to dive into the wonderful world of crayons and learn how to draw skin colors that look as real as life!
But before we get started, tell me, what kind of skin tones are you most interested in drawing? Are you hoping to draw people with light, medium, or dark skin tones? Knowing this will help me tailor our lesson to your specific interests.
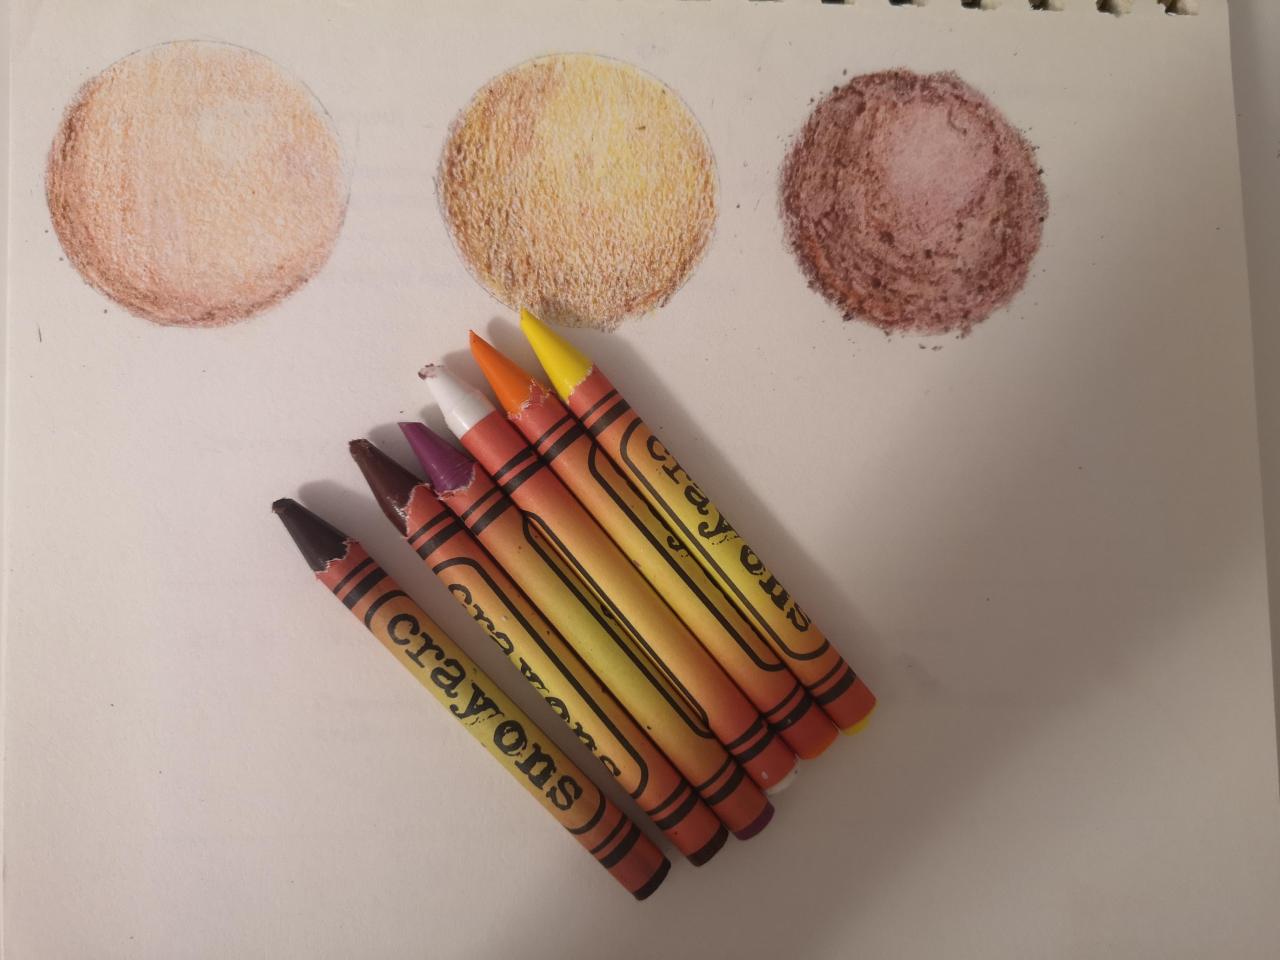
The Magic of Crayons
Crayons are amazing tools for young artists. They’re easy to hold, come in a wide variety of colors, and are perfect for creating bold, vibrant drawings. Plus, they’re super forgiving! If you make a mistake, you can simply erase it and start over.
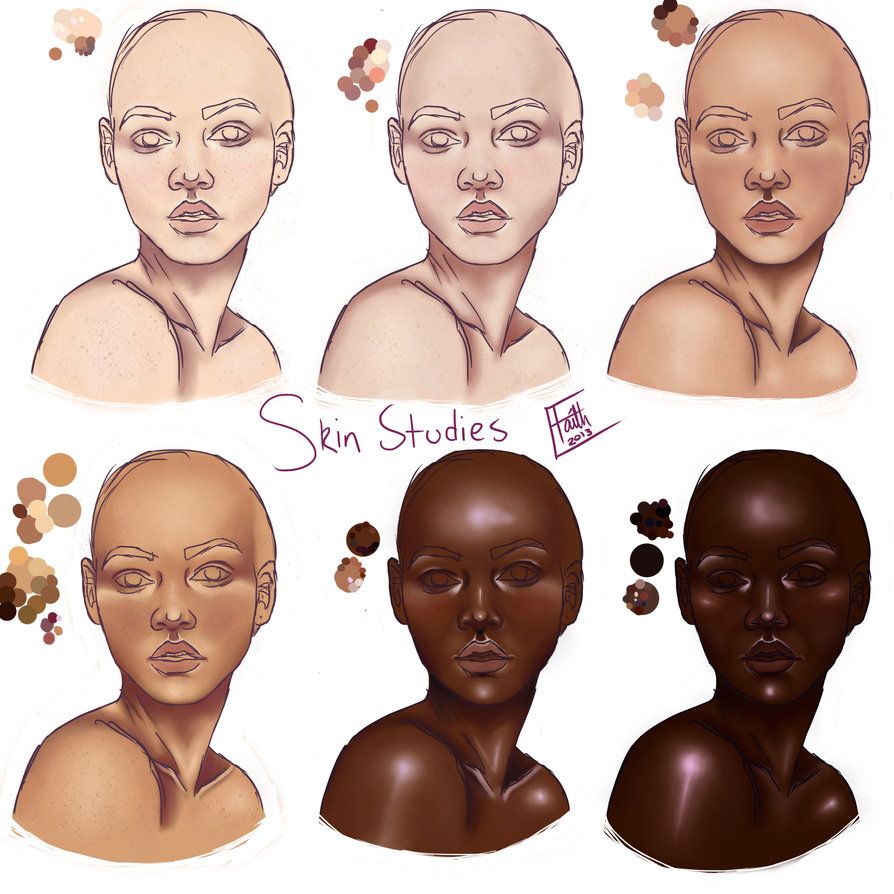
The Secret to Skin Tones
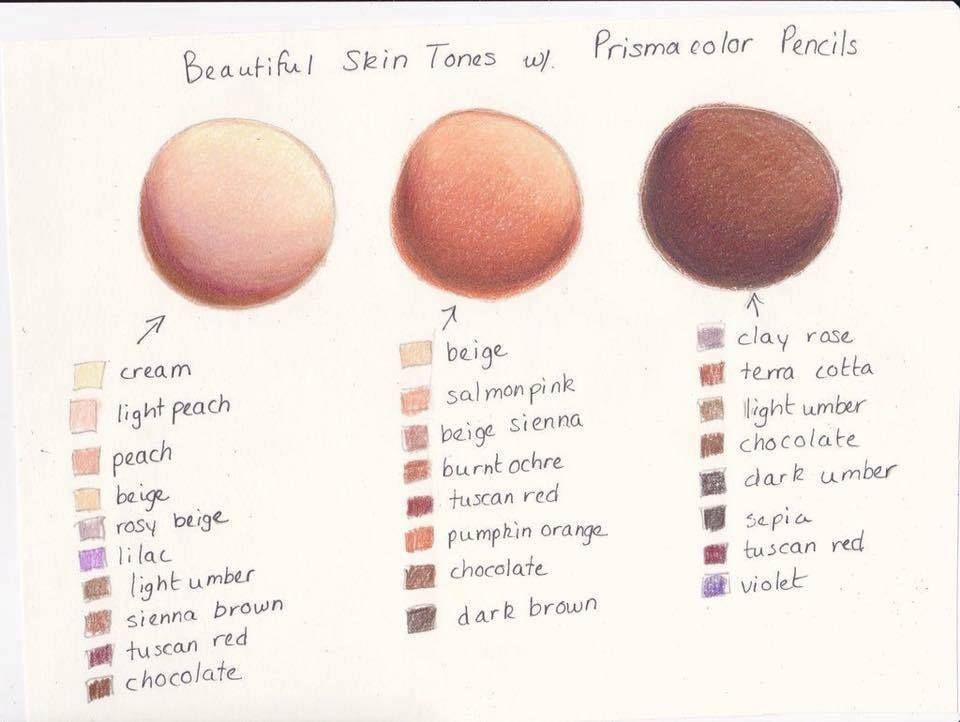
Skin tones aren’t just one color. They’re actually a mix of many different colors, just like the rainbow! That’s why we need to learn how to blend and layer colors to create realistic skin tones.
Here’s a simple way to think about it:
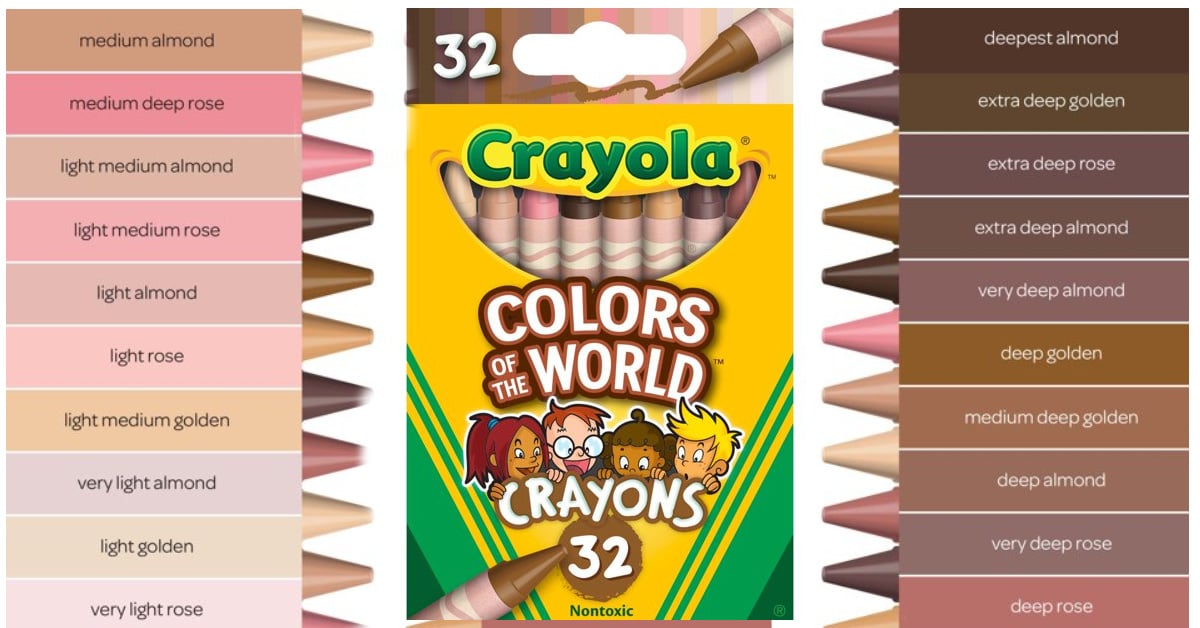
- Light Skin Tones: Imagine a mix of light pink, peach, and a touch of yellow.
- Medium Skin Tones: Think of a mix of peach, brown, and a hint of orange.
- Dark Skin Tones: Combine brown, red, and a bit of purple.
But remember, these are just starting points! You can experiment with different color combinations to create your own unique skin tones.
Let’s Get Started!
1. Warm-up Your Crayons: Before you start drawing, it’s always a good idea to warm up your crayons. This helps the colors blend more smoothly. Simply color a few lines or shapes on a scrap piece of paper.
2. The Base Layer: Choose your base color for your skin tone. For example, if you’re drawing a light skin tone, start with light pink or peach. Use a light touch and gently color in the area where you want your skin to be.
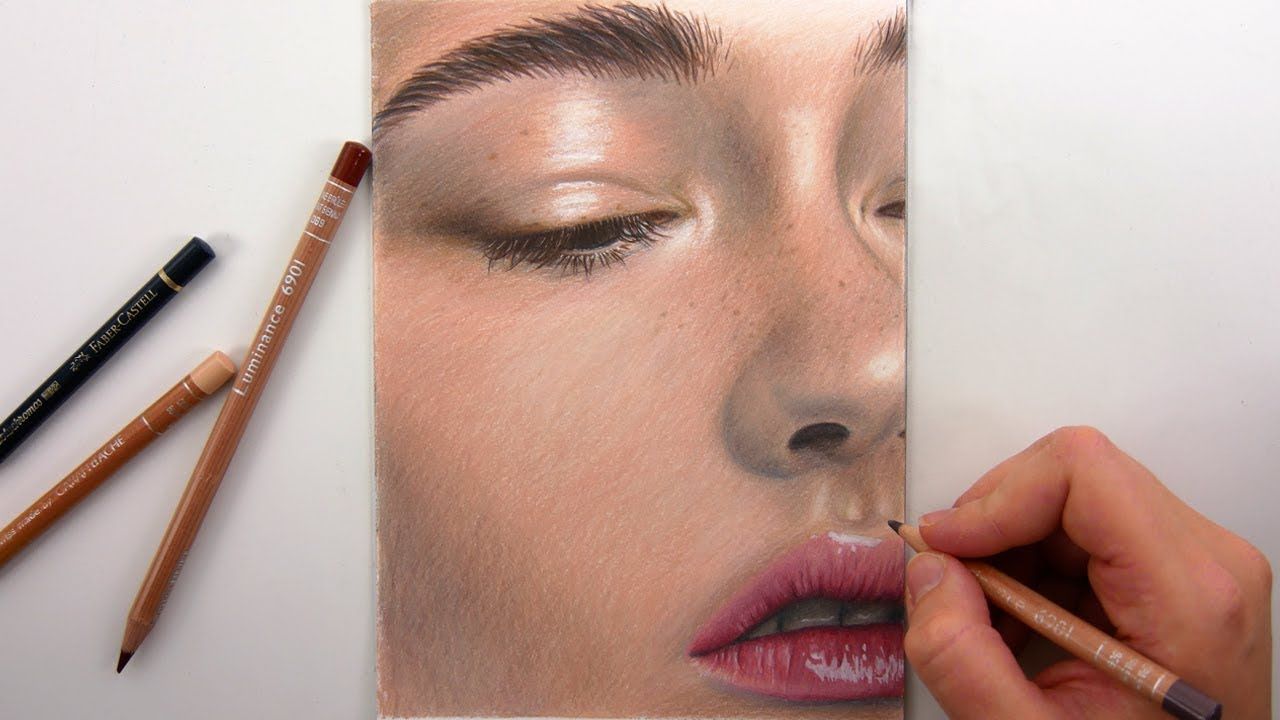
3. Adding Depth: Now, let’s add some depth to our skin tone. Choose a darker shade of your base color. For example, if you started with light pink, you might use a darker pink or even a touch of brown. Gently color over the base layer, focusing on areas where you want to create shadows, like under the nose or around the eyes.
4. Highlighting: To make your drawing really pop, let’s add some highlights. Choose a lighter shade of your base color, like a very pale pink or a touch of yellow. Gently color over the areas where light would naturally hit the skin, like the cheekbones or the forehead.
5. Blending Magic: Now, here comes the fun part! Use your finger or a blending tool (like a cotton swab) to gently rub the different colors together. This will create a smooth, realistic skin tone.
6. Details, Details, Details: Once you’ve blended your colors, you can add more details to your drawing. Use a darker crayon to create shadows around the eyes, nose, and mouth. You can also use a lighter crayon to create highlights on the lips, eyebrows, and hair.
Practice Makes Perfect
Remember, drawing skin tones is a skill that takes practice. Don’t be discouraged if your first attempts don’t look perfect. Keep practicing, and you’ll be amazed at how much you improve!
Here are a few tips to help you on your journey:
- Look at real people: Pay attention to the different shades and tones of skin you see in your everyday life. Notice how light and shadow play on the skin.
- Experiment with different colors: Don’t be afraid to try different color combinations. You might be surprised at what you create!
- Have fun! Drawing should be enjoyable. Relax, let your creativity flow, and enjoy the process.
Frequently Asked Questions
1. How do I draw different skin tones?
- Remember the base colors we discussed earlier! Light skin tones start with pink and peach, medium skin tones with peach and brown, and dark skin tones with brown and red. Then, experiment with blending and layering to create your own unique skin tones.
2. What if my crayons don’t blend well?
- Try using a blending tool, like a cotton swab or your finger, to help smooth out the colors. You can also use a light touch and gently layer the colors to create a blended effect.
3. How do I draw wrinkles and other details?
- Use a darker crayon to create shadows in the creases of wrinkles. You can also use a lighter crayon to create highlights on the raised areas of the skin.
4. What if I’m not happy with my drawing?
- Don’t worry! Everyone makes mistakes. Just erase the parts you don’t like and start over. Keep practicing, and you’ll get better with time.
5. How can I learn more about drawing skin tones?
- Check out books and websites that offer drawing tutorials. You can also look for online videos or classes that teach drawing techniques.
Now, tell me, what are you excited to draw first? A portrait of a friend, a character from your favorite book, or maybe even a self-portrait? The possibilities are endless! Let’s get drawing!
Thus, we hope this article has provided valuable insights into Downloads Let’s Get Colorful! Learning to Draw Skin Tones with Crayons. We thank you for taking the time to read this article. See you in our next article!